Showing posts with label pasta. Show all posts

December 19, 2018

Pasta Aglio e Olio

Pasta Aglio e Olio - the one pasta sauce that everyone should know--and keep in the back pocket for a crazy week night.

My company shuts down over Christmas week and New Year's, which is great, but it means that this week is crunch time before we all turn into Christmas pumpkins on Friday.  After a long work day, I wanted to cook away the craziness of the day, even though it was tempting to just pick something up.  I didn't have much food--well, besides Christmas cookies--in the house (as I'm getting ready to head to California for Christmas).  It has been so long since I made pasta aglio e olio, and since it requires pantry staples that I had, I was all set!

This pasta dish is simple - angel hair pasta is tossed in a light sauce of extra virgin olive oil with garlic and chili flakes.  It comes together in less than a half hour.  The pasta cooks while the garlic sizzles.  Before the pasta becomes al dente, transfer it to the skillet with the garlic and oil  Add pasta water, and cook it over medium heat, stirring and tossing quickly.  This will emulsify the oil with the pasta water.  If you over reduce it, and it feels too oily, add more pasta water.  You'll notice below that I recommend adding only 1/4 cup of the pasta water to start.

With the red pepper flakes and some parsley, it makes a festive dish.  I was jonesing for some Oregon Pinot Noir when I made this, but this would go really well with a Pinot Grigio. (PS - My favorite wine toy is now the Coravin.  It is a cool gadget that will pierce the cork and allow you to dispense a glass of wine, and the cork reseals.  Enjoy a glass of wine without opening the bottle!)

Add a salad (or not - depending on lettuce recalls), and dinner is served!

Pasta Aglio e Olio
Yields 4 servings

Ingredients:
8 oz. dried angel hair or spaghetti
1/4 cup extra virgin olive oil
5 garlic cloves, cut into thin slices
1/2 tsp. crushed red pepper flakes
1 cup freshly shredded Parmesan Reggiano cheese
2 tbsp. fresh Italian parsley, chopped
Salt, to taste

Directions:
Bring a large pot of water to a boil over high heat.  Add the pasta and some salt, and allow the pasta to cook until just al dente.

While the pasta cooks, combine the garlic, extra virgin olive oil, and red pepper flakes in a large skillet over medium-low heat.  Stir until the garlic turns golden and fragrant, about 5 minutes.

Drain the pasta, and reserve about 1/2 cup of the pasta water.  Add the pasta and 1/4 cup of the water to the garlic skillet, and mix well.  Add salt, and mix in the cheese.  Serve with parsley on top.

Source: Inspired from many

December 12, 2018

Spicy Skillet Lasagna


Easy, quick, and good weeknight dinner recipes are not always easy to find. This skillet lasagna can be on the table in an hour.  It would be a great dinner to make when you have last minute dinner guests.  Bonus: only one pan required!

This skillet lasagna has a few twists from other skillet lasagnas: no ricotta, broccoli rabe, lemon zest, and pepper flakes.  The ricotta is swapped out with Gruyere.  Gruyere melts so beautifully, and it really went well with the broccoli rabe and other ingredients.  By adding broccoli rabe, you not only get veggies in, but this also brings a new dimension with some spice to the lasagna.  The lemon zest sounded strange to me, but trust me, it works.  It makes the other flavors pop!  I love adding red pepper flakes to Italian dishes, and it added a good kick to this dish.

Hope you enjoy this!

Spicy Skillet Lasagna
Yields 6 servings

Ingredients:
2 tbsp. extra virgin olive oil
1.5 lbs. spicy Italian sausage, casings removed
3 shallots, minced
2 cloves garlic, minced
2 small lemons, zested
1 tsp. red pepper flakes
1 bunch broccoli rabe, trimmed and cut into 1-inch pieces
1 1/2 tsp. salt
8 oz. no boil lasagna noodles
1 25 oz. jar tomato marinara sauce (suggested Rao’s)
1 1/2 cups shredded Parmesan Reggiano
1/2 cup Gruyere
1 lb. fresh mozzarella, dried well and torn into pieces

Directions:
Preheat oven to 375°F.

In a 12-inch skillet, heat the extra virgin olive oil over medium heat. Add the sausage and cook, breaking it into small size pieces with a spoon, until cooked through, about 8-10  minutes.  Add  shallots and garlic and cook until translucent, another 3 minutes.  Add the lemon zest and red pepper flakes and cook for additional 2 minutes.  

Stir in the broccoli rabe and salt; cook until wilted, 2 minutes. Remove the mixture to a medium bowl, and return the pan to the stove over low heat.

Add a small amount (around 1/4 cup) of tomato sauce in the bottom of the skillet.  Add the remaining sauce to the sausage mixture.  Layer half of the lasagna noodles in the skillet.

Cover with half of the sausage mixture. Add 3/4 cup of the Parmesan and half the mozzarella. Layer with the remaining noodles.  Cover with the remaining sausage mixture and top with the rest of the Parmesan, mozzarella, and Gruyere.  

Bake for 40 minutes in oven or until golden bubbly.

Source: Giadzy

December 5, 2017

Pork Ragout


This dish requires your patience, but you will be very well rewarded.  This is big flavor, simple ingredients, and all-around comfort food.

This dish isn't complicated, but it requires about two hours for the pork to cook and become tender.  Basically, you brown the pork and cook some onions and garlic.  Then, you add some white wine to deglaze the pot.  You could add red wine, but I think white wine keeps it a little lighter.  After, you add some tomatoes, herbs, and chicken broth, and you let the pork cook in an sauce of amazingness.  The pasta doesn't get cooked completely in the water because it will finish cooking when you add it to the sauce. At the end, you add some parm, some olive oil, and some arugula.  Finally, bon appetit!

You could make it in the slow cooker, but if you do, make sure you brown the pork before adding it into the slow cooker.

Instead of using forks to shred meat, use your stand mixer.  Yes, you read that right!  Add warm meat (with any bones removed) to the bowl of your stand mixer.  Put on the paddle attachment, and turn on your stand mixer to medium-low speed.  In about three minutes, you'll have perfectly shredded meat. It's much faster and easier than using the two fork method.

Next time you are looking for a hearty, insanely good, and tasty pasta dish for dinner--and have some time, give this one a try.

Pork Ragout
Yields 10 servings

Ingredients:
3 pound pork shoulder roast, cut into 3-inch chunks
1 1/2 tbsp. Kosher salt
1/4 tsp. ground black pepper
3 tbsp. cooking oil (vegetable oil or grapeseed oil)
8 sprigs thyme
2 sprigs rosemary
1 bay leaf
2 medium onions, thinly sliced
5 cloves garlic, minced
1 cup white wine
1/2 cup chicken broth
1 28-ounce can crushed tomatoes
Pinch red chili flakes
1/4 cup extra virgin olive oil, plus more for drizzling
1 lb. rigatoni or penne pasta
1 Parmesan cheese rind
6 tbsp. freshly grated Parmesan, plus more as a desired
Arugula, if desired

Directions:
Use paper towels to dry the pork well and sprinkle on all sides with 1 tbsp. of the kosher salt and the pepper.  Heat 2 tbsp. of the cooking oil in a Dutch oven over high heat.  Working in batches, brown the pork on all sides, about 3-5 minutes per side.  Remove the pork to a plate and set aside.

Once the pork has been browned, reduce the heat to medium.  Add the remaining 1 tbsp. cooking oil.  Then, add the onions and the remaining Kosher salt.  Cook for about 8-10 minutes, stirring and scraping any brown bits.  Then, add the garlic and cook for another 2 to 3 minutes.  Deglaze with the white wine and cook until nearly dry, 8 to 10 minutes.

Then, add the chicken broth, crushed tomatoes, Parmesan rind, chili flakes, and herbs and bring to a simmer.  Return the pork to the pot and tuck it under the sauce.  Reduce the heat to low and simmer, covered, for about 2 hours until the pork is fork tender.

Remove the pork and shred it.  Remove the herbs from the sauce and add the pork back to the pot.  Stir in the olive oil and half of the grated Parmesan.  Keep warm over low heat.

Bring a large pot of salted water to a boil and cook the pasta for about 1 or 2 minutes less than the package instructions.  Drain and add the pasta to the sauce, tossing to cook.  Finish cooking the pasta in the sauce and add a ladle of pasta water as needed.

Serve with the remaining Parmesan and a drizzle of olive oil, and garnish with baby arugula.

Source: The Giadzy

January 21, 2016

Baked Ziti


When I visited my family in California over the Christmas, family visiting from Atlanta came over to my parents' house, and I got to play chef!

For lunch, I made a baked ziti with homemade breadsticks.  The great thing about baked ziti is that you can make it ahead.  I love make ahead dishes because then you aren't stuck in the kitchen cooking and cleaning while everyone eagerly awaits the good eats.  With ziti, you can make it the day before and leave it in the fridge or freezer!  While the ziti cooks in the oven, you can spend time with your guests without feeling worried about being away from the stove. ;)

Onto this (okay, I almost typed "thiz ziti") ziti dish.  This baked ziti uses meatballs.  My mom had some premade meatballs on hand, so we used those, but I'm also include ingredients and directions for making your own meatballs.

For the tomato sauce, my mom had a few jars of basic tomato sauce in her pantry.  I decided to "doctor" up these sauces.  A good tomato sauce makes all the difference!  I added the jarred sauces to a large Dutch oven, and I sautéed onion and garlic which I then added into the Dutch oven.  I also added a few generous splashes of red wine and around a tablespoon olive oil, as well as some fresh parsley and basil.  Because butter makes everything taste better, I also added half a stick of butter.  To finish it off, I added sea salt, freshly ground black pepper, and a generous tablespoon of Italian seasoning to the mixture.  After everything simmered, it made for one great tomato sauce.

Despite the copious amount of food in my parents' house around Christmas, there was no ricotta cheese at my parents' house (and I've become a bit of a snob when it comes to making ricotta because nothing compares to the creaminess of homemade ricotta...make it yourself or bust!), but there was plenty of cottage cheese.  The cottage cheese add a little tang and was a nice contrast from the traditional ricotta.

This dish was a hit! I forgot to take pictures after it cooked, but everyone gobbled it up.  Leftovers taste even better since the flavors have marinated more, too.

Baked Ziti
Yields 6-8 servings

Ingredients:

1 lb. meatballs or ingredients below if you are making meatballs:
1/4 cup bread crumbs
2 large eggs
2 tbsp. milk
1/2 cup grated Parmesan or Romano
1 lb. ground beef (or a mix of sausage and ground beef)
1/4 cup chopped fresh parsley
1/4 tsp. salt
1/4 tsp. pepper
1/4 cup all-purpose flour (for dredging)

1 lb. ziti pasta
1/4 cup extra-virgin olive oil
5 cups tomato sauce or three jars of tomato sauce
3 cups cottage cheese or whole milk ricotta
2 cups mozzarella, shredded
3/4 cup Parmesan, shredded
8 tbsp. butter, cut into pats
Basil leaves, optional
Salt and pepper, to taste

Directions:
Grease a large baking 9 x 13 baking dish and set aside.  Preheat oven to 350ºF.

For the meatballs:
If you are making the meatballs: In a large bowl, combine the bread crumbs, eggs, milk, Romano cheese, parsley, salt, and pepper, and mix.  Then, add the ground beef and mix until the ingredients are evenly dispersed.  Shape into bite size meatballs (a little under the size of a tablespoon).  Roll each meatball in flour, and shake off the excess.

For homemade or purchased meatballs: In a large skillet, heat the olive oil over medium-high heat.  When almost smoking, add the meatballs in batches, and allow them to brown on one side for about 3 minutes.  Turn meatballs and brown the other wise.  After the meatballs are cooked, remove from the pan from the stove, and put the meatballs on a plate.

For the pasta:
In a large pot, bring 6 quarts of water to a boil. Add the pasta and cook for about 8 minutes or until al dente.  Drain the pasta and set aside.

In a large bowl, mix the tomato sauce and the cottage cheese/ricotta (along with any desired salt and pepper),  and then add the cooked pasta and meatballs.  Stir to combine, and then pour in the mixture into the baking pan.  Sprinkle the mozzarella and Parmesan cheese over the top.  Place the pats of butter over the ziti, and add the basil leaves.

Cover with aluminum foil and bake for 30 minutes.  Then, remove the foil and bake for another 15-20 minutes or until the top is golden and bubbly.

Note: In case this is a make-ahead meal, after you assemble the ziti, you can also refrigerate it (for up to 2 days) or freeze it.  If you freeze it, remove it from the freeze a day before you want to bake and allow it to defrost in the fridge overnight.

Source: Adapted with modification from Giada De Laurentiis

November 5, 2015

Pastitsio


Denver had our first snow yesterday.  Though, it was pretty light and did not stick around very long.  A few hours later, the sun was out!  Usually, it snows by Halloween.  The mountains have been getting some good snow lately, which makes me excited for ski season (especially since I took a ski hiatus the past few years).

With winter coming for this part of the hemisphere (my readers in Australia and New Zealand are thinking about summer!), it's time to start thinking about some great comfort winter eats.  Say hello this Pastitsio, which is like a Greek lasagna.

Now, this is a bit of a time consuming recipe, but it is so worth it in the end, and you will have leftovers, so that saves you time in the future! ;)

The first step involves making a meaty tomato sauce.  Onions are sautéed first, and then meat is added.  Pastitsio generally has lamb in it, but I'm not a big lamb fan, so I used a combination of ground beef and Italian sausage.  Wine, aromatic spices, and tomatoes are added to the mixture.  After simmering for about 45 minutes, you have one heckuva sauce, and your kitchen will smell seriously delicious.

The second step is making the béchamel sauce.  Like the usual béchamel way, you first melt butter and added flour to make a roux.  Meanwhile, milk and cream simmer, and then they are added to the roux.  After the mixture thickens, nutmeg, salt, and pepper are added, along with Parmesan cheese.  Once the sauce cools, Greek yogurt is added.  The Greek yogurt helps soften the flavor and add some more creaminess.

While the sauce cooks, you also boil water for pasta.  For the pasta, you can use small pasta shells or even regular penne.  You don't need to overcook the pasta because it will get baked.

After the pasta is done, assembling the dish is straightforward and quick.  The pasta gets mixed into the meaty tomato sauce, and then it is transferred to your baking dish of choice.  Then, the béchamel sauce gets spread on top, and more Parmesan cheese gets sprinkled.  Finally, it is baking time!  Alternatively, you can refrigerate the prepared Pastitsio for up to two days or freeze it.  All you need to do is then bake it!  If you freeze it, make sure to defrost it before baking.  Making it ahead is a great option for a dinner party, too.

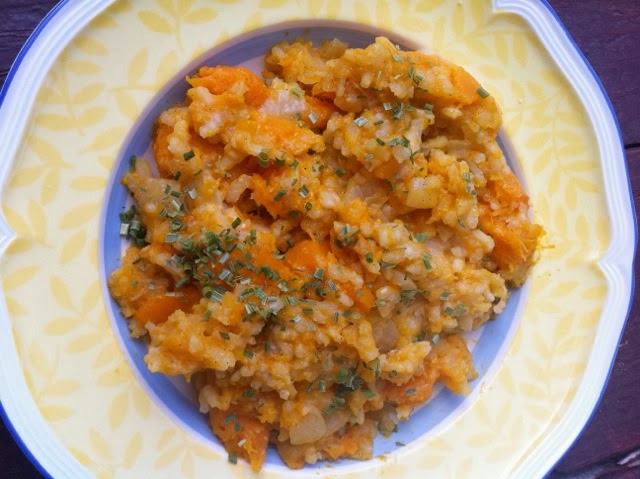
This dish was time intensive and involved a lot of dishes and pots, but it was so worth it.  The meaty tomato sauce had such great flavors from the red wine, garlic, and spices, and the béchamel sauce was a creamy addition.  Parmesan cheese was just the cherry on top. :)  I made this for a Friday night dinner party, and it was well gobbled by my friends. :)


Pastitsio
Yields 10 servings

Ingredients:
Extra virgin olive oil
1 large onion, chopped
2 lbs. ground meat of choice (1 lb. ground beef and 1 lb. pork sausage, 1 lb. ground beef and lamb)
1/2 cup red wine
3 cloves garlic, minced
1 tbsp. ground cinnamon
1 tsp. dried oregano
1 tsp. fresh thyme, chopped
Pinch of cayenne pepper
1 28 oz. can of crushed tomatoes
1 tbsp. salt
1 1/2 tsp.  ground black pepper

For the béchamel sauce:
1 1/2 cups whole milk
1 cup heavy cream
4 tbsp. (1/2 stick) butter
1/4 cup (30 grams or 1.07 oz) all-purpose flour
1/4 tsp. ground nutmeg
1/2 tbsp. salt
1 tsp. black pepper
3/4 cup shredded Parmesan cheese
Barely a full cup or 7 oz. plain Greek yogurt
12 oz. small pasta shells
2 large eggs, lightly beaten

For the topping:
3/4 cup shredded Parmesan cheese

Directions:
Preheat the oven to 350ºF.

In a large pot, heat 3 tablespoons of extra virgin olive oil over medium-high heat.  Add the onion, and saute for 5 minutes until slightly translucent.  Then, reduce to medium heat, add the ground meat and continue to saute for about 10 minutes or until the meat is no longer pink.  As you saute, use the spoon to crumble the meat.  Then, add the wine and cook for 2 minutes.  Next, add the garlic, cinnamon, oregano, thyme, and cayenne, and continue cooking for about five minutes.  Now, add the tomatoes, salt, and pepper.  Lower the heat, and simmer, stirring occasionally, for about 40 minutes or until the liquid evaporates.  Then, set aside.

For the béchamel sauce, heat the milk and cream in a small saucepan over medium-low heat, until it begins to simmer.  In a medium saucepan over medium heat, melt the butter, and then add the flour, and whisk constantly for 2 minutes.  Pour the hot milk mixture into the butter mixture, and continue whisking for another five minutes until thick and smooth.  Add the nutmeg, salt, and pepper, and stir in the Parmesan cheese.  Remove from heat, and allow the sauce to cool for about 10 minutes, and then stir in the yogurt.

Meanwhile, in a large pot of boiling water, cook the pasta to al dente.  Do not overcook.  Drain the pasta and set aside.

To assemble, combine the pasta with the tomato meat sauce, and pour it into a 11 x 15 x 2-inch baking dish.  Spread the béchamel sauce evenly over the pasta and sprinkle wit the remaining Parmesan cheese.  Bake for 1 hour until golden brown and bubbly.  Allow it to rest for 15 minutes (if you can wait that long!) before serving.

Source: Ina Garten's Make it Ahead

October 14, 2014

Carnaroli Risotto


When I first started making risotto, I thought that the creamy texture came from using good cheeses and creams.  While cheese and cream help, I have learned that the creamy texture comes from using the right kind of rice.

The most common and widely available risotto rice is arborio, but I have found that carnaroli is even better--and now easier to find thanks to Williams-Sonoma (aka my version of Toys 'r Us).  Carnaroli has a higher starch content, firmer texture, and a longer grain.  As a result, it retains its shape better during risotto making.

This risotto is simple but very rich.  At it's heart, it's a basic risotto with onions, some butter, and Parmesan cheese, and it is distinguished with two key ingredients: carnaroli rice and whipped cream.  The carnaroli rice is what really gave the risotto a creamy texture.  Before liquids are added, the rice is cooked with onions, and this toasts the rice, in essence, and results in a nutty taste.  (Mmm...nutty aroma, glass of white wine?  Yes, please!)

Now, let's talk about adding whipped cream.  I know the logical thought is that the whipped cream adds more creaminess.  In this case, I felt that the whipped cream actually helped add some air to the risotto which made this rich dish lighter and almost silky.

The bottom line: you are in for a decadent dinner with this risotto!  The flavors seem simple, but simple is good.  Bon appetit!

Carnaroli Risotto
Yields 4 servings

Ingredients:
1/4 cup heavy cream
4 cups chicken stock
1/4 cup canola oil
1/2 cup minced onion
2 tsp. kosher salt
1 1/2 cups Carnaroli rice (or Arborio rice)
1 cup white wine
8 tbs. cold butter
1 cup Parmesan Reggiano cheese, grated
Salt, to taste

Directions:
First, prepare the whipped cream.  In a small mixing bowl, use an electric mixer to whip the cream to firm peaks.  Then, cover and refrigerate.

Next, in a medium sized saucepan, heat the chicken broth to a simmer.  In another medium sized saucepan, heat the oil over medium heat.  Add the onion and the salt.  Stir the onions, and cook until they are soft but not browned.  Add the rice and continue to cook, stirring frequently for 3 minutes.  Add the white wine and stir constantly until all of the wine is absorbed by the rice.

Add 1 cup of the chicken stock.  Stir until it is almost completely absorbed by the rice, about 2 minutes.  Continue adding 1/2 cup of the stock at a time, and allow each addition to absorb before adding the next.  The rice will be tender but still firm to the bite (al dente!), and the mixture should be creamy.   Once the rice is cooked to al dente, add butter and stir it into the rice until melted.  Add the Parmesan Reggiano and stir until combined.  Add any desired salt to taste, and then quickly stir in the whipped cream.  Serve immediately.

Source: Thomas Keller via Williams-Sonoma

August 19, 2014

Cauliflower Risotto


Cauliflower is a very versatile vegetable.  Besides serving it as a side dish or with a dip, you can make faux breadsticks, pizza crust, mashed "potatoes," and even risotto.  Each time that I have used cauliflower in a non-traditional way (mashed "potatoes" or breadsticks), I have been so impressed, which leaves me inspired to keep playing with more creative ways to use cauliflower.

Enter cauliflower risotto!

With the food processor, you can turn the cauliflower into "rice" in a matter of seconds.  Oooh, fancy schmancy!  If you don't have a food processor, you could just use a regular shredder, which will be a little messier and take a little longer.

I had a small amount of arborio rice left in my pantry, so I still used that in this risotto just to help keep the texture of the risotto more like a traditional risotto.  (Besides, that almost empty box of risotto was driving me nuts.  I mean, there's enough rice in the box to make 2 different meals of risotto, but the remaining amount leftover is not enough to make another meal.  Ah, this kind of reminds me of George Banks and the infamous hot dog and hot dog bun scene.)

The technique of cooking this risotto is similar to the normal risotto technique, so there's lots of stirring and pouring liquids in phases.  And, one of those liquids is wine.  OH YEAH!!

"I love to cook with wine, sometimes I even put in the food."

Risotto can be a more intimidating dish to make, so many the Risotto Gods decided that wine was necessary so people would feel less stressed while making it?  Either way, a glass of wine sure helps with all that stirring.

I added in some crispy prosciutto to the final dish, which brought the right amount of saltiness to the dish.

See, you can have your risotto and eat vegetables, too.  What is your favorite cauliflower recipe?

Cauliflower Risotto
Yields 4 servings (as a main dish)

Ingredients:
1 head cauliflower
1 shallot, diced
3 cloves garlic, minced
2 tbsp. butter
2/3 cup arborio rice
2 tbsp. olive oil
3/4 cup white wine
3 cups chicken broth
1 cup Parmesan Reggiano, Asiago, and/or Pecorino Romano
2 tsp. dried parsley
3 slices of prosciutto, optional
Salt and pepper, to taste

Directions:
First, it's time to turn the cauliflower into risotto.  Cut the florets off the top of the cauliflower, and put the chopped cauliflower in the food processor.  Pulse the cauliflower until it is finely chopped.

Second, heat the chicken broth.  Place the chicken broth into a medium saucepan over medium heat.  Bring to a boil, and then allow to simmer.

Next, let's start cooking the cauliflower and the rice.  Add butter to a medium saucepan over medium-high heat.  Add the shallot and garlic, and cook for a minute.  Then, add the cauliflower, and continue stirring.  Meanwhile, add olive oil to skillet over medium-high heat.  Add the arborio rice and coat in olive oil.  After about three minutes or when the rice has turned a light, golden color, remove the skillet from the heat, and carefully transfer the rice into the saucepan.   (Keep the skillet nearby, and don't bother washing it yet--you will still need it.) Add the wine to the saucepan, and continue stirring until the wine has evaporated.

Add 1/2 cup of the simmering broth.  Stir until it is almost completely absorbed by the rice, about 2 minutes.  Continue adding 1/2 cup of broth at a time, and stir constantly and allow each addition of broth to absorb before adding the next.  This process can take about 20 minutes.

While the broth absorbs, crisp the prosciutto.  Bring the skillet (that you used for the rice) to medium heat.  Add the prosciutto slices to the skillet, and allow them to crisp on each side (about 1 minute per side).  After the prosciutto is crispy, turn the heat off and allow the prosciutto to cool.

After the last amount of broth has finished absorbing, remove the risotto from the heat.  Add in the parsley, and stir.  Then, break up the prosciutto, and stir it into the risotto.  Finally, add the cup of cheese. Season with any additional salt or pepper, as desired.

Source: A Simply Sweet Justice Original

November 14, 2013

Butternut Squash and Vanilla Risotto


This is one of my favorite autumn recipes to make.  It's creamy and rich, yet nutty and sweet.  I often will make this for dinner parties in the fall.  My friends have described it as "BEST RISOTTO EVER," "I'd marry this risotto," and "Risotto coma."

Risotto may be more time consuming than most pasta dishes, but it is not difficult.  The delicious outcome is most definitely worth the stirring and standing.  Risotto often includes wine as an ingredient, and making risotto is even better when you have a glass of wine in hand!

The rice becomes creamy as the dish slowly simmers.  All of the flavors just meld so well together; you have the sweet tastes from the vanilla and squash contrasted with the onions and the salty Parmesan cheese. The sautéed onions really take on all of the risotto flavors nicely.  The vanilla is not overpowering and adds just a subtle sweetness.

Adding crushed slivered almonds or pancetta, roasting the butternut squash, or even throwing in some sage would be great ways to enhance the flavor of this already delectable risotto.

Butternut Squash and Vanilla Risotto
Yields 4 main course servings or 6 side dish servings

Ingredients:
4 cups vegetable or chicken broth
1 large vanilla bean
3 cups butternut squash cubes, peeled (1" width)
3 tbsp. butter
1 onion, finely chopped
1 1/2 cups Arborio rice
1/2 cup white wine
1/2 cup freshly grated Parmesan
Salt, to taste
Chives, to taste

Directions:
In a medium saucepan, warm the broth over medium-high heat.  Cut the vanilla bean down the middle, scrape out the seeds, and add the seeds and the bean to broth.  When the broth begins to simmer, reduce the heat to low.

Add the butternut squash cubes to the summering broth and cook until tender, about 5 to 7 minutes.  Using a slotted spoon, remove the butternut squash to a bowl, and reduce the growth to a low heat and cover to keep warm.

In a large heavy saucepan, melt 2 tablespoons of butter over medium heat, add the onion, and sauté until tender, about 5 minutes.  Add the rice, and stir to coat with the butter.  Then, add the wine and simmer until the wine is completely evaporated.  After, add 1/2 cup of the simmering broth and stir until completely absorbed, about 2-4 minutes.  Continue cooking the rice and adding the broth 1/2 cup at a time.  Allow the rice to absorb the broth before adding more.

After the broth is added and absorbed, remove the vanilla bean, and turn off the heat.  Gently stir in the butternut squash, Parmesan cheese, the remaining tablespoon f butter, and any desired salt.  Transfer the risotto to a serving bowl and sprinkle with chives.

Source: Giada De Laurentiis

May 29, 2013

Pasta Alla Caprese


The  combination of creamy mozzarella, sweet ripened tomatoes, and fresh basil never gets old.  This Italian summer time dish has such simple flavors,  and simple is good.

Knock on wood, we haven't had snow in Denver for a few weeks now (though, never say never; it snowed in June during my first year here), so I bought some flowers and herbs to plant.  I was excited to have some fresh basil again and was eager to make something with it.  Fresh basil is just so darn good.

When trying to decide what to make for dinner, I looked in my fridge and found some fresh mozzarella that I forgot about (now, how could I forget that?) and some ripe tomatoes.  Caprese salad sounded good, but with a long run the next day, I needed some carbs in me…and voila, pasta alla caprese. ;)

This was a simple dish to make, and it comes together so quickly.  By cooking the tomatoes with garlic, the tomato flavor just ripens.  The mozzarella melts slightly when added to the warm pasta, yum!  I used casarecce shaped pasta so the ingredients could get caught in the grooves of the pasta. ;)  I learned from Giada Di Laurentiis to reserve about 1/2 cup of pasta water before you drain the cooked pasta.  The reserved pasta water allows you to adjust the consistency of your pasta sauce, if needed.  The water contains starch that will add more body to the sauce than if you just used plain ol' tap water.

This can be served either warm or cold, making it a perfect summer night dinner or an addicting pasta salad at a barbecue.

Pasta alla Caprese
Yields 4 servings

Ingredients:
8 oz. casarecce or another pasta of your choice (penne, fusilli)
3 large tomatoes, sliced
5 tbsp. extra virgin olive oil
4 cloves garlic, minced
8 oz. fresh mozzarella, diced
1/4 cup fresh basil, torn
1 tbsp. balsamic vinegar
Salt and freshly ground black pepper, to taste

Directions:
Bring a large pot of water to a boil, and add pasta.  Cook until pasta is al dente, about 10 to 12 minutes. After the pasta finishes cooking, drain and put the pasta in a bowl, and toss it with 2 tbsp. of extra virgin olive oil.   Keep about 1/2 cup of the pasta water on the side.

While the pasta cooks, heat the 3 tbsp. of the olive oil over a skillet on medium heat.  Add the garlic and cook until the garlic becomes fragrant.  Add the sliced tomatoes, and slowly stir and flip as the tomatoes cook.  After the tomatoes have softened, about 4 minutes, smash the tomatoes with a wooden spoon to make a chunky tomato sauce.  Remove the skillet from the heat, and add the tomato sauce to the bowl, and stir to combine.

Once the tomato sauce is evenly distributed, add the diced mozzarella, fresh basil, and balsamic vinegar to the pasta, and toss.  If the pasta seems dry, add the reserved pasta water in tablespoon increments.

Source: A Simply Sweet Justice Original

May 12, 2013

Champagne Risotto


Pasta is always my go-to dinner the night before a long run.  Because I am training for some summer runs, I'll be carb loading with pasta more!

So, what's the deal with carb loading?  When you eat pasta, most of the carbs are store as glycogen in muscles and liver.  Glycogen is easiest form of energy for the body to access.  When you run out of glycogen during a long run, you hit a wall.  The body has to slow down because it needs to convert fat into energy.  Carb loading doesn't make you run faster, but it allows you to run your best.  I feel and run better if I carbed it up before the run.

When rummaging my pantry for pasta for a "night before long run dinner," I came across two boxes of Arborio rice way in the back and decided it was time to make Risotto.  Champagne risotto just sounded good.  Can you really go wrong with a dish that has champagne in it?

Rumor has it that Risotto originated in Northern Italy back in 1574.  The Gothic cathedral Duomo di Milano was being built, and an apprentice was staining the glass windows.  He added saffron to the paint to obtain a richer color.  As a result, he was teased.  Enough was enough, and he added saffron to the rice as a revenge in hope that saffron would ruin the rice.  Well, everyone loved the addition to their rice, and it spread fast through Italy.

Risotto carries a connotation of being a sophisticated, fancy pants kind of dish. It requires more labor than your standard pasta dish, but it really makes for a special dish.

Risotto is a type of Italian rice dish that is cooked in broth to a creamy consistency.  There are three types of rices that work well for Risotto: carnaroli, nano, vialone, and arborio.  These rices can swell up and absorb the liquid without becoming mushy.  I generally use arborio because it is the easiest to find.

As far as the cooking: First, the rice is cooked briefly with onion and butter.  This allows the rice to be coated in a film of fat.  Next, some type of wine is added, and it is absorbed by the rice.  Following the wine absorption, broth or stock is added in small amounts, and your stir constantly.  The stirring loosens the starch molecules from the rice, and that helps to create the smooth creamy texture.  After the broth is absorbed, you generally add some butter and cheese to add more flavor and creaminess.  If you don't want to use champagne, Prosecco would be an excellent substitute.

Enjoy this dish for a date night, special occasion, or just because.

Champagne Risotto
Yields 2 servings

Ingredients:
3 oz. thinly sliced prosciutto or pancetta
3 cups chicken broth
2 tbsp. butter
12 asparagus spears, cut diagonally into 1-inch pieces
1 shallot, finely chopped
3/4 cup Arborio rice
3/4 cup champagne (or another sparkling wine)
1/4 cup freshly grated Parmesan cheese
Salt and freshly ground black pepper, to taste

Directions:
Preheat the oven to 450ºF.  Lightly grease a baking sheet or a piece of foil.  Place the prosciutto or pancetta slices onto the baking sheet or the foil.  Bake until the slices are almost completely crisp, about 6 to 8 minutes.  The slices will crisp up as they cool.  After the slices are finished crisping, set aside.

In a medium saucepan, bring the chicken broth to a boil.  Blanch the asparagus in the broth for two minutes, and then remove the asparagus with a slotted spoon.  Set the asparagus aside.  Reduce the heat of the broth to a low simmer.

In another medium saucepan, melt 1 tablespoon of butter.  Add the shallot and cook until the shallot is transparent and tender, about 2-4 minutes.  Add the Arborio rice and stir to coat it in the butter.  Continue toasting the rice, stirring constantly for about 3 minutes more.  Add the champagne and simmer until the champagne has almost evaporated, about 3 minutes.  Drink champagne during this process. :)

After the champagne has nearly evaporated, add 1/2 cup of the simmering broth.  Stir until it is almost completely absorbed by the rice, about 2 minutes.  Continue cooking the broth, adding 1/2 cup at a time, and stir constantly and allow each addition of broth to absorb before adding the next.  This process takes about 20 minutes.  The rice will be tender but still firm from the bite, and the mixture should be creamy.  Once finished, removed from the heat.

Stir in the asparagus, the remaining butter, the Parmesan cheese, and add salt and pepper to taste.  Spoon the risotto into serving dishes and garnish by breaking the prosciutto or pancetta into small pieces over the risotto.

Source: Adapted from Giada DeLaurentiis' Everyday Pasta

January 13, 2013

Skillet Lasagna

Lasagna.  One dish.  One hour.  Homemade.  My friends, it can be done!

This recipe has the classic flavors and cheesy layers of a traditional lasagna, but it will be on your table in much less time.  For the noodles, you will want to use the traditional lasagna noodles, not the no-boil noodles.  The noodles will cook in the juices of the tomatoes.

My mom often cooks lasagna for big family get-togethers.  When my mom makes lasagna, nobody goes hungry.  Her lasagna gets made in a huge pan that I'll refer to as Goliath.  I have never seen a pan this large available for sale to the general public, even at a commercial cooks' store.  And, during my shifts of dish duty, instead of soaking and scrubbing a pan that doesn't fit in the sink, I just *may* have opted to use the hose outside to clean Goliath.  (So, to all of my family reading this and wondering where the heck I would go while cleaning the dishes, now you know.  I was outside hosing the lasagna pan.  Yes, "classy" with a "k.")  ;)

Overall, this did the trick for a lasagna craving.  For a larger dinner party, going the "traditional route" with a Goliath, Jr. would be the way to go, but for a quick weeknight dinner, this is one recipe to keep in your repertoire.

Next time you a craving comfort food but don't have as much time to cook, give this skillet lasagna a try.

PS: It tastes even better the next day!

Skillet Lasagna
Yields about 6 servings

Ingredients:
1 1/2  cans 28 oz. whole peeled tomatoes, with juices
1 tbsp. extra virgin love oil
1 medium onion, diced
Salt
Freshly ground black pepper
4 cloves garlic, minced
Pinch of red pepper flakes
3/4 tsp. dried Italian seasoning
1 lb. Italian sausage, crumbled
8-10 curly-edged lasagna noodles, broken into 2-inch lengths
3/4 cup mozzarella cheese, shredded
1/2 cup Parmesan cheese, shredded
3/4 cup ricotta cheese
Minced fresh basil for garnish, optional

Directions:
In the bowl of a food processor, pulse the tomatoes with juices so that the tomatoes are coarsely chopped.

In a large cast iron skillet, heat the olive oil over medium heat.  Add the onion, salt, and pepper to the pan and cook, stirring occasionally, for 5-7 minutes.  Mix in the garlic, red pepper flakes, Italian seasoning, and cook until fragrant for about 30 seconds.

Next, add the Italian sausage to the pan and cook until no longer pink.  Scatter the broken lasagna noodles all over the pan, and pour the tomatoes with juices over the top.  Increase the heat to medium-high and cover.  Stir often until the lasagna noodles become tender, about 20-25 minutes.

Preheat the broiler to high.  Once the pasta is al dente, remove the skillet from the heat.  Mix in half of the mozzarella and Parmesan cheeses, along with 1/4 cup of the ricotta.  Dot the remaining ricotta over the top, and then evenly sprinkle with the remaining mozzarella and Parmesan cheeses.  Transfer to the oven.  Broil for about five minutes or until the cheese bubbles and becomes golden.

Remove from the oven, garnish with basil, and serve.

Source: Adapted from Pasta Revolution
Free Blog Template by June Lily